


Create your own unique gift wrap using some of your favorite OOLY art supplies! DIY gift wrap paper is the perfect way to personalize a birthday gift, or make Christmas gifts extra special. It’s also a wonderful project for kids and their parents to complete together. We used homemade cardboard stamps and our favorite chunkies paint sticks to create our wrapping paper. Read below for the full step-by-step tutorial so that you can make your own!

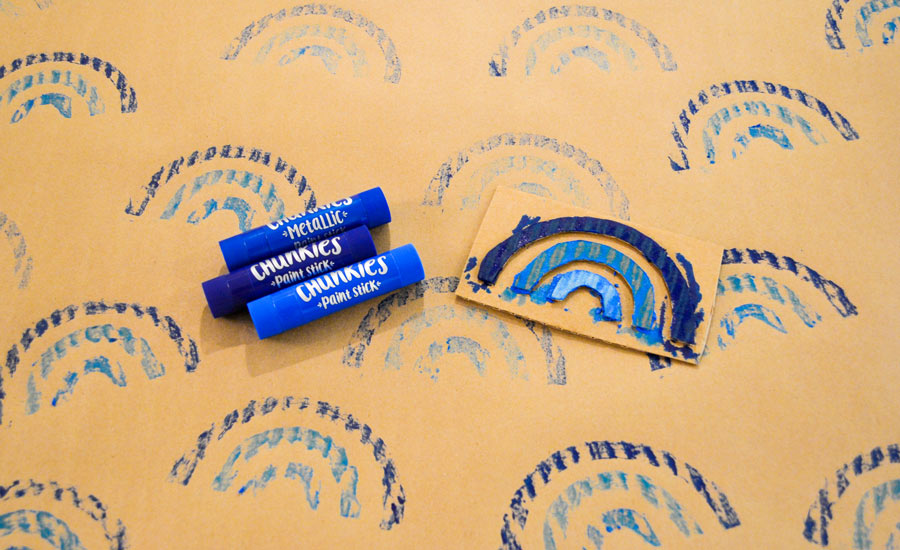
 And then, to create the clouds on the rainbow design, I outlined them with markers and used Rainbow Sparkle Watercolor Gel Crayons to fill in each design. After coloring in with crayons, you can use also a paint brush with water to spread the gel crayon color around and fill in the clouds. These gel crayons leave a beautiful metallic sheen!

Emily Limer is a mom of two and DIY enthusiast! You can find more craft ideas on her Instagram page: @makingwithmommy
Materials Needed
- Recycled cardboard
- Scissors/box cutter
- Brown butchers paper (you can purchase it in a roll)
- Hot glue gun
- Ribbon
- Chunkies Paint Sticks
- Rainbow Sparkle Glitter Markers
- Big Bright Brush Markers
- Rainbow Sparkle Watercolor Gel Crayons
- Pixie Paste Glitter
- Erasers and other goodies to tie onto packages!
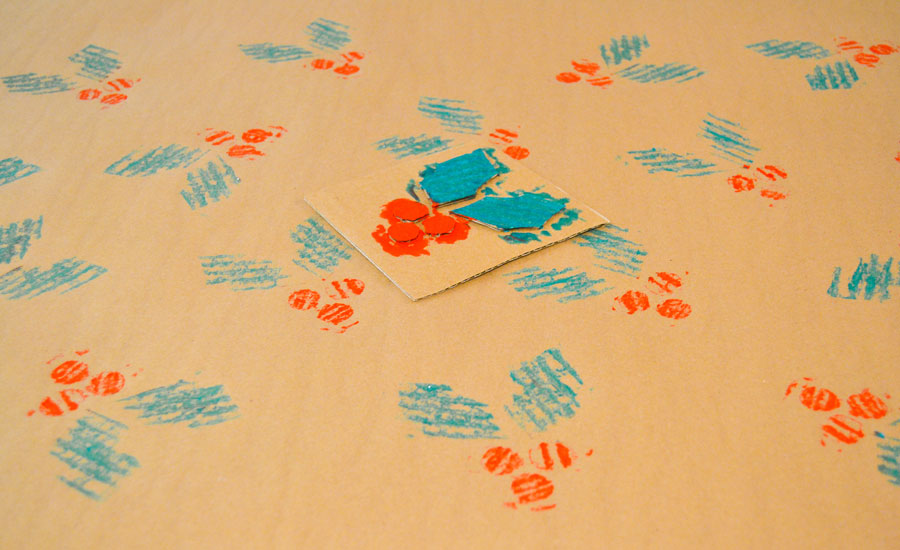
Step 1: Make your stamp!
First, create your cardboard stamps. Start by drawing your shapes on a piece of cardboard. Cut out the shapes for your stamp. With your hot glue gun, glue these pieces onto another piece of cardboard and cut the background piece of cardboard so that it is just a bit larger than the stamp shape. If desired, you can hot glue a bottle cap onto the back of your stamp to help you hold it.
Step 2: Stamp and Repeat!
Lay out your brown butchers paper on a flat surface. Use your Chunkies Paint Sticks to put a heavy coat of paint onto each of the cardboard sections of your stamp. You can use different colors on each section, I love using the metallic and neon colors from the set, they really pop on the butcher paper. Next, flip the stamp over and press firmly onto the butchers paper. Finally, pull the stamp up to reveal! Repeat, repeat, repeat!
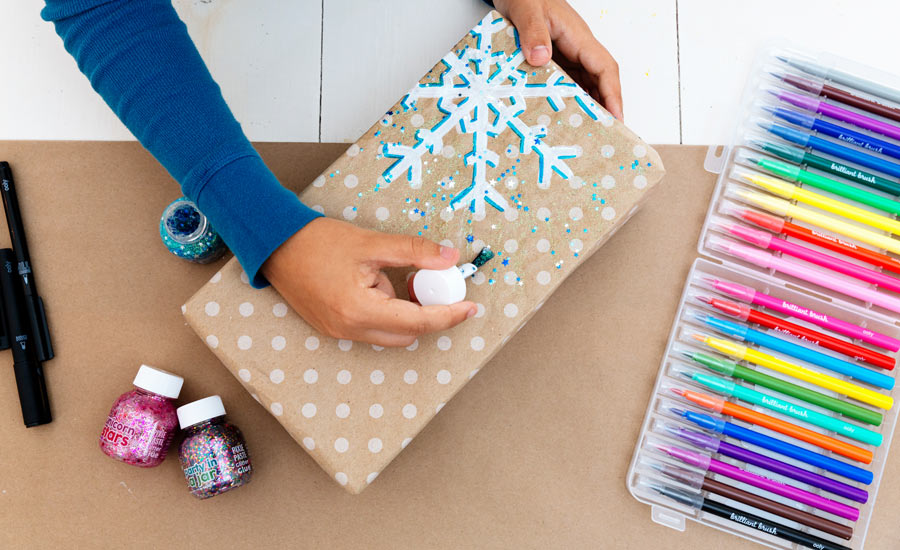
Step 3: Make it Sparkle!
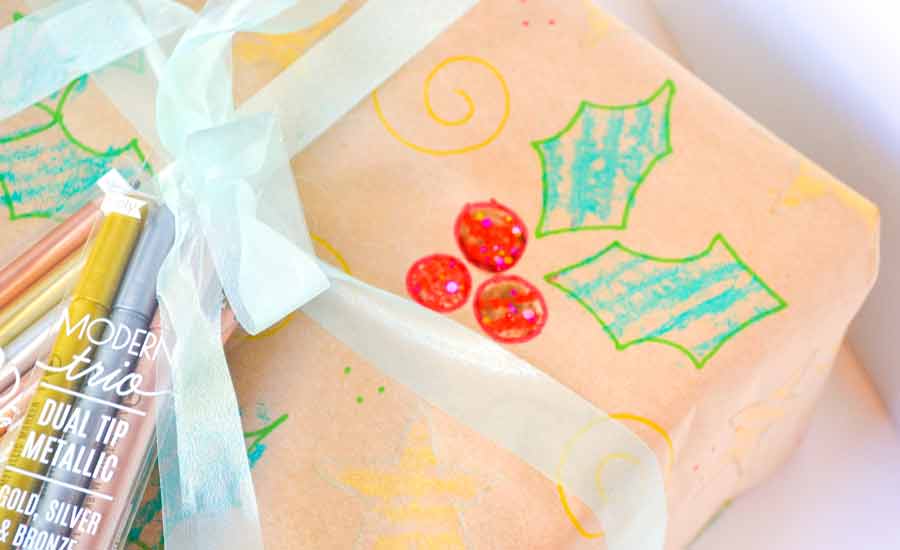
Next, use markers, crayons and glitter glue to embellish to your stamp designs. I brushed Pixie Paste glitter onto some of the stamps on our wrapping paper. After, I also used Rainbow Sparkle Glitter Markers to outline the stamps in our holly berries design!
And then, to create the clouds on the rainbow design, I outlined them with markers and used Rainbow Sparkle Watercolor Gel Crayons to fill in each design. After coloring in with crayons, you can use also a paint brush with water to spread the gel crayon color around and fill in the clouds. These gel crayons leave a beautiful metallic sheen!
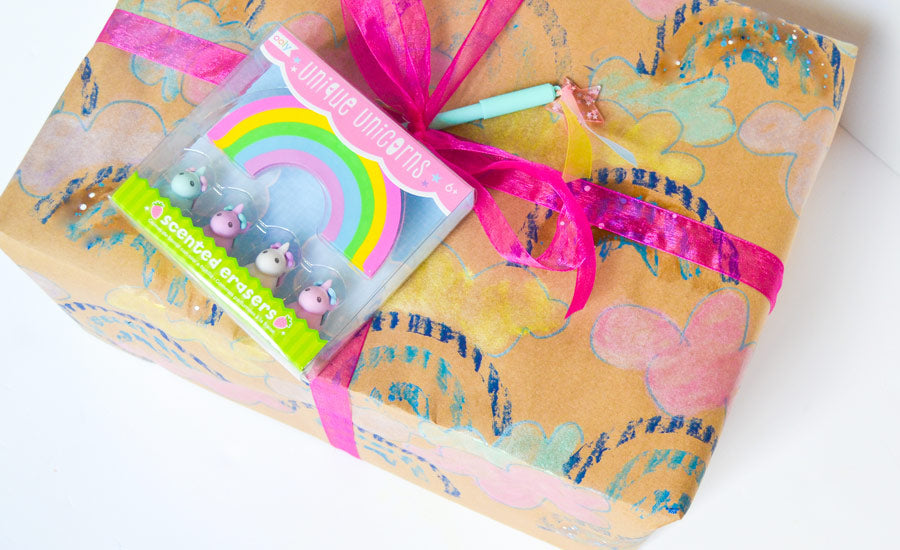
Step 4: Wrap it Up!
Once your wrapping paper has dried, wrap your gifts! I like to finish them with a bit of ribbon and finally I like to add cute goodies on the top of the package as a teaser!
Give the Gift!
Finally, give the presents out to your family and friends to enjoy! Thanks so much for following along with us on this project! Be sure to check out these super cute DIY gift bags to go with your handmade wrapping paper. Happy Holidays!Emily Limer is a mom of two and DIY enthusiast! You can find more craft ideas on her Instagram page: @makingwithmommy


