


Craft blog by: Lucia Mallea (@luciamallea)
Ah Spring…a positively hopeful season that ushers in a new beginning. To greet Spring with a bloomin’ good time, I’m creating some delightful paper flowers. These whimsical beauties are a simple DIY for kids, and you would never guess they are made out of cupcake liners. This fun craft is a great way to welcome Spring and keep your creativity in bloom all year round. Not only will they add a touch of charm to any space in your home, but they can also make a sweet fashion accessory. Add a brooch to the back and voila - you can wear your pretty pastel creation!
Time Duration: 45 minutes
Skill Level: Beginner
Other Items Needed:
- White cupcake liners
- Glue
- Floral wire or regular wire
- Scissors (adult supervision required)
- Blow dryer for Magic Puffy Pens (adult supervision required)
Directions:
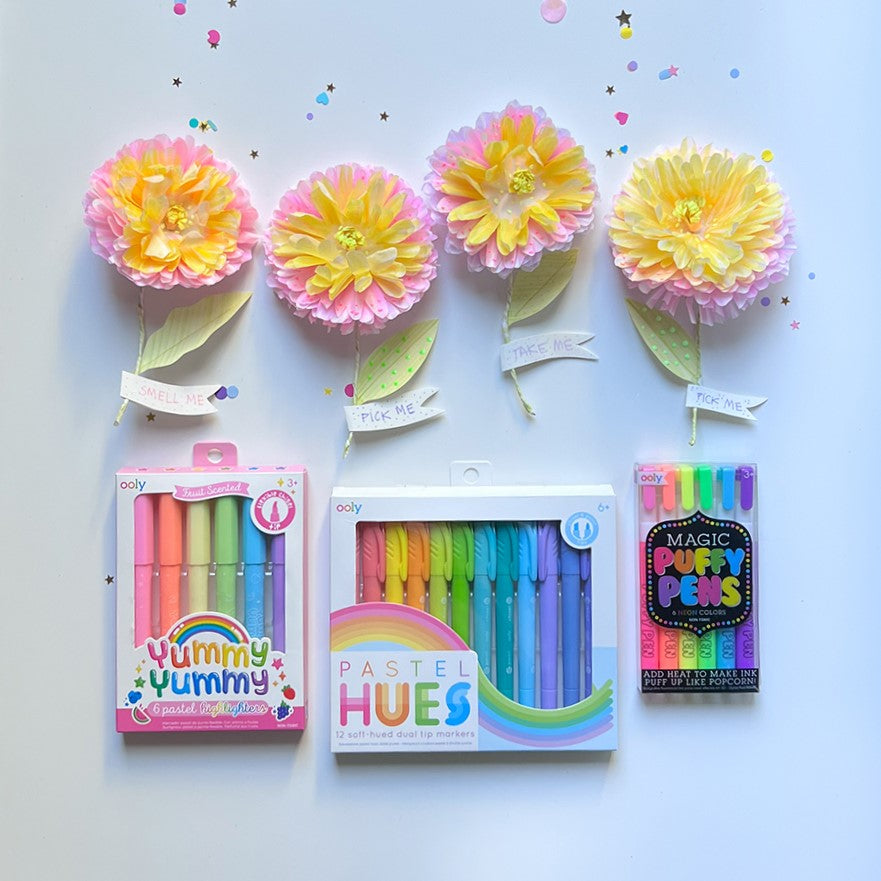
 Step 1: Color your cupcake liners using your favorite colors of your Yummy Yummy Highlighters and Pastel Hues Markers. I used pinks, oranges, yellows and purples.
Step 2: Once you’ve colored the cupcake liners, we’ll transform them into flowers! Fold the liner as shown - in half, then in half again, and then in half one more time! Once folded, cut three petal shapes - these can be rounded, pointed, or squiggly. Open the liner and look - you made a flower! If you want to add some depth to the flower, add a few strokes of a coordinating color. You can also add little dots to the center of the flower using the fine point of your Pastel Hues Markers.


Step 3: Using your Magic Puffy Pens add little dots on your flowers. Watch the paint puff by using your hair dryer. (Note that the yellow liners will be the center of your flower, so for those, make sure you add the dots in the middle.)


Step 4: Cut a strip of paper from the White DIY Cover Sketchbook and use the orange and yellow highlighters to create two lines. Fold a little bit of the yellow part inward and add some Puffy ink. Add the heat and watch it pop! Now, cut small strips to make a fringe (see image).


Step 5: To create the stem, cut a strip of paper from your White DIY Cover Sketchbook, then color it green using your Pastel Hues Markers. Glue the tip of the paper to your wire and wrap it around until the wire is covered.


Step 6: Roll up the yellow fringe to the wire. Use a little glue to secure it.

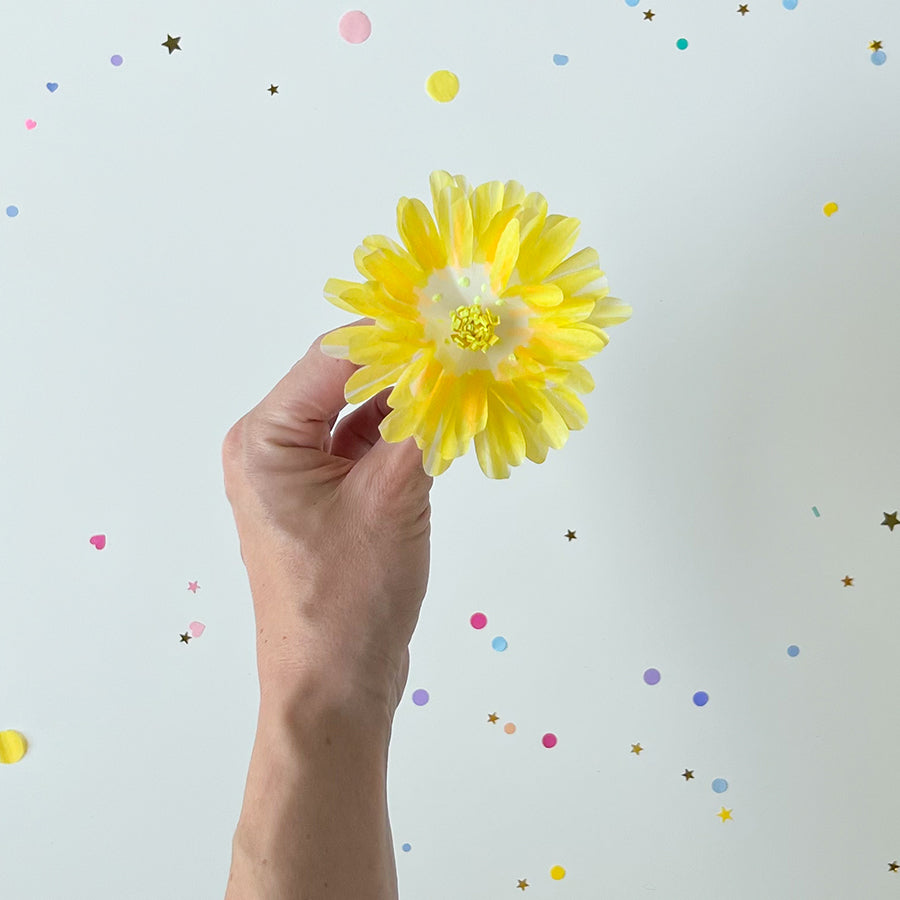
Step 7: Poke the yellow paper through the wire and push it all the way up. Continue doing so with all the other flower layers you’ve made. Add some glue at the bottom of the last one to secure it.


Step 8: Using paper from the White DIY Cover Sketchbook make little leaves. Use your Pastel Hues Markers to color the leaves. Using the fine point, draw a line in the center. Make little dots on the leaves using your Magic Puffy Pen.

Step 9: Glue the leaves to the stem and your flowers are ready!!

With these adorable DIY cupcake liner flowers, you can create a garden that's blooming all year long. It’s such a simple DIY that really brings so much joy and positivity to Spring! I love to put these in a cheery vase to brighten up my kids’ bedrooms - and the best part is I don’t have to remember to change the water! With a little bit of imagination and a whole lot of cupcake liners, the possibilities are endless. YAY for Spring!
We would love to see photos of your craft projects! Tag us on Instagram at @WeAreOOLY using #OOLYcreateyourhappy.


