


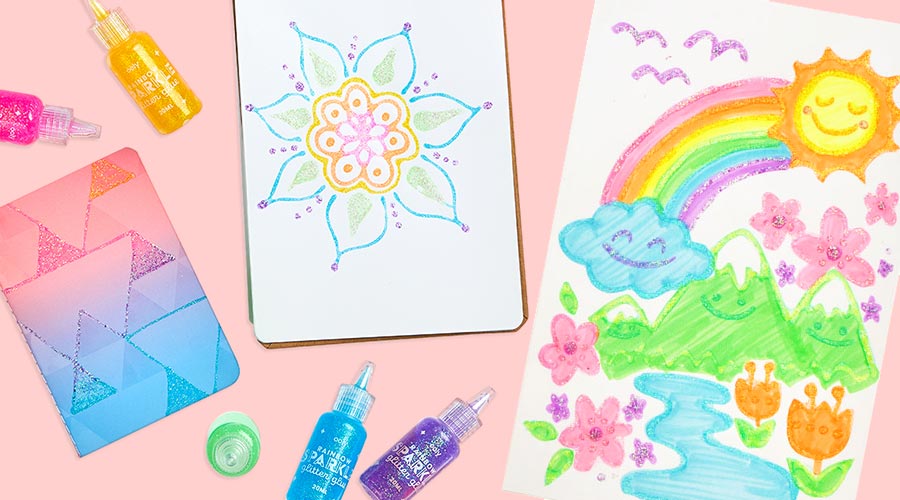
Calling all unicorn lovers! Create your own magical unicorn with sparkles, rainbow colors, and your favorite craft supplies from OOLY. This sparkly DIY unicorn craft is a great activity to keep little (or big) hands busy and get their creative juices flowing. It also is eco-friendly! I used the cardboard from recycled cereal boxes to make this unicorn.
Unicorns and OOLY supplies go hand-in-hand; they’re both all about sparkles and rainbow colors – which I (of course) love! Ready to bring your unicorn dreams to life? Read below for the full tutorial and to get your free template.

 So we'll first color the area with the color(s) of your choice. I chose to do blue and purple stripes on the mane and hair. After coloring, use the Smooth Stix paintbrush (included) and a bit of water to paint over the crayon and spread the color out, creating a beautiful watercolor effect. I find that it helps to use a circular motion with the brush as you paint. Allow this to dry on a flat surface to prevent curling.
 Need more unicorn? Try this fun and interactive craft with a free printable unicorn page. You can also shop for the unicorn- (or mermaid, dragon, or monster) lover in your life. Find your favorite Happy Packs, Bonus Boxes, and more.
About the Author: Emily Limer is a mom of 3, sharing crafts and playtime ideas on Making with Mommy. Follow @makingwithmommy on Instagram to see more fun craft ideas for kids!
Materials Needed for your DIY Unicorn Craft:
-
- 1 x Empty Cereal Box
- Pencil
- Scissors
- Glue (liquid or hot glue would be best)
- Paint Brush
- Black Permanent Marker or OOLY Ink Works Markers
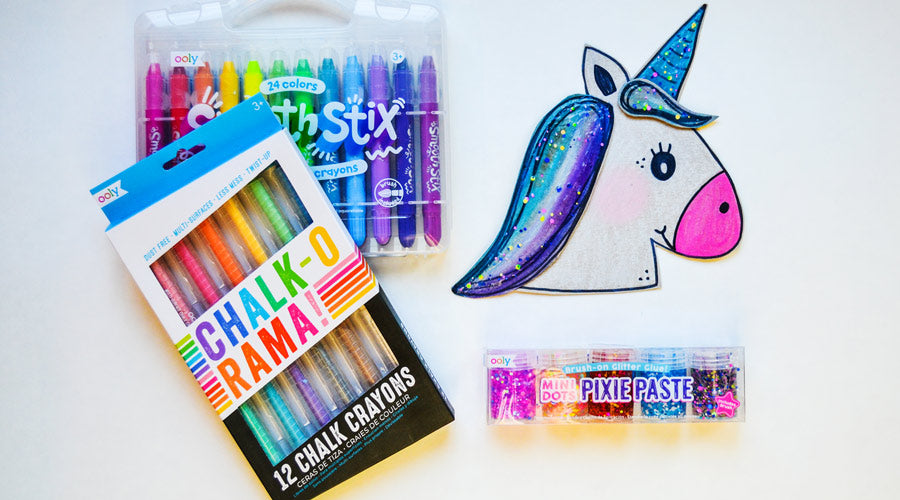
- Chalk-O-Rama Dustless Chalk Crayons
- Smooth Stix Gel Crayons
- Pixie Paste Glitter Glue
- Printable Unicorn Template
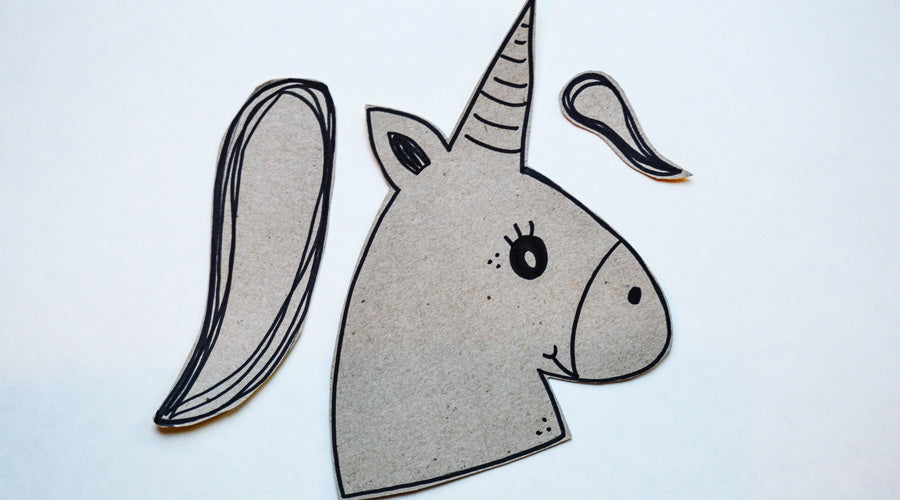
STEP 1:
Print out your unicorn template and cut out each of the shapes. Then, trace each shape onto the cardboard (cereal box) with a pencil, remove the template and use a black permanent marker to trace over your pencil lines. With the same marker, add details (as desired) such as an eye or texture in the hair. And lastly, cut out the unicorn shapes.
STEP 2:
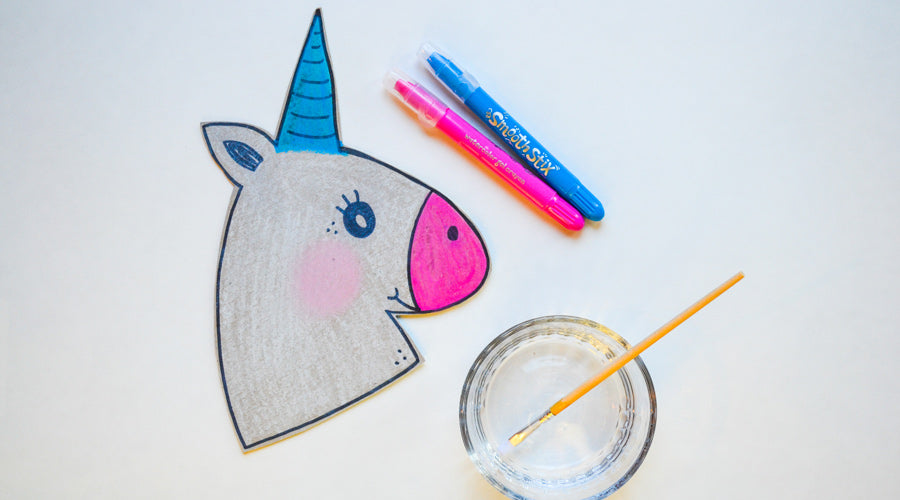
Now it's time to color your unicorn's face with OOLY's Chalk-O-Rama Dustless Chalk Crayons. I chose to use the white chalk crayon for most of the face and added some blush to the cheek with a pink crayon. Once you have finished coloring, use your fingertip to gently rub the chalk crayon, dispersing the color more evenly and blending the pink and white colors.
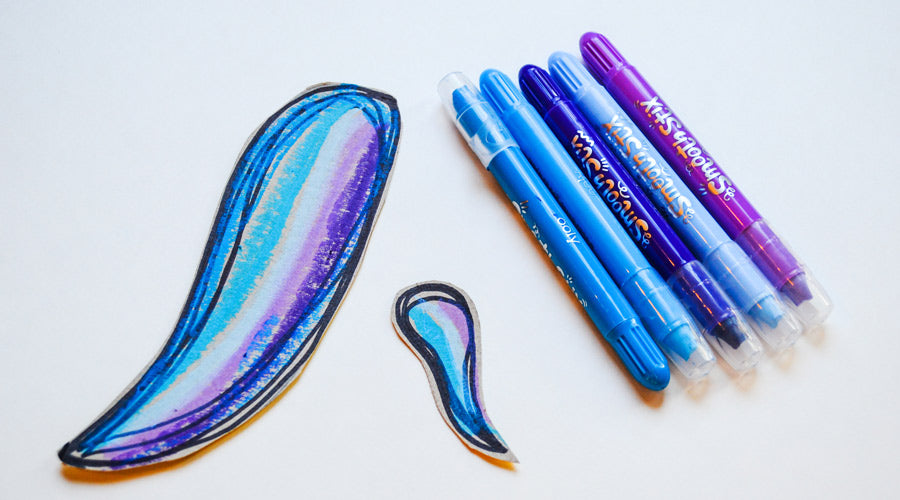
STEP 3:
Use your Smooth Stix Gel Crayons to add color to the unicorn’s horn, nose, mane, and hair. I love the effect that OOLY's gel crayons have on the cardboard because they create such bright, beautiful colors!
So we'll first color the area with the color(s) of your choice. I chose to do blue and purple stripes on the mane and hair. After coloring, use the Smooth Stix paintbrush (included) and a bit of water to paint over the crayon and spread the color out, creating a beautiful watercolor effect. I find that it helps to use a circular motion with the brush as you paint. Allow this to dry on a flat surface to prevent curling.
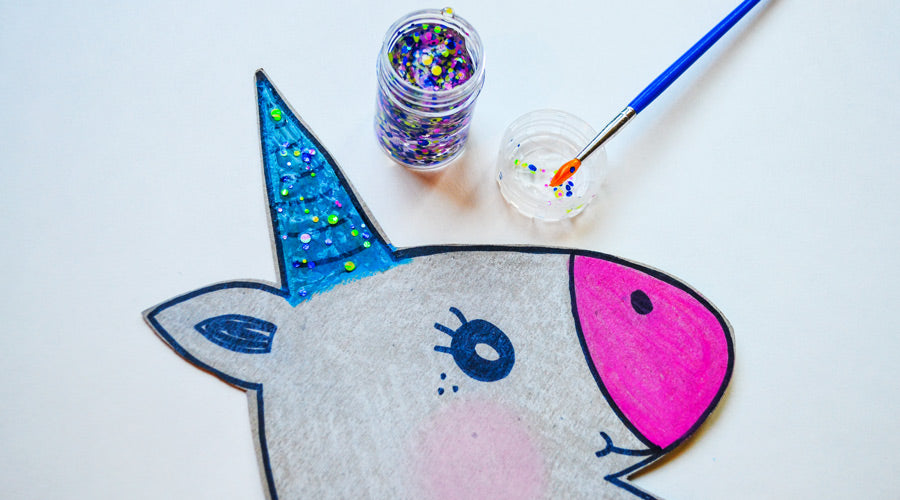
STEP 4:
Once your Smooth Stix has dried, use the paintbrush to add Pixie Paste to the unicorn’s horn, mane and hair. Pixie Paste is such a magical finishing touch since a bit of sparkle brings it all together.
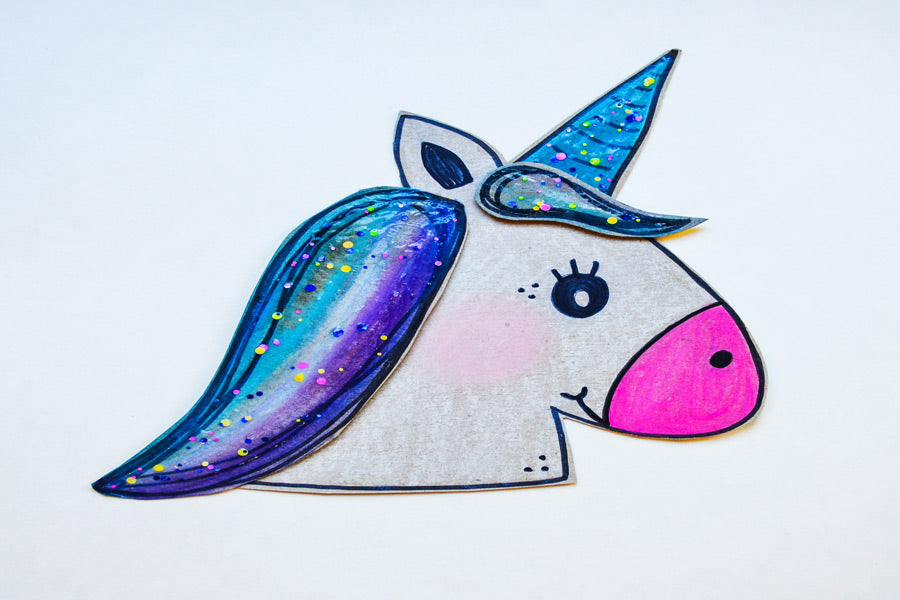
STEP 5:
Finally, once everything is dry, use either liquid or hot glue to glue all of the pieces together. And there you go, you've created your very own magical unicorn!
Need more unicorn? Try this fun and interactive craft with a free printable unicorn page. You can also shop for the unicorn- (or mermaid, dragon, or monster) lover in your life. Find your favorite Happy Packs, Bonus Boxes, and more.
About the Author: Emily Limer is a mom of 3, sharing crafts and playtime ideas on Making with Mommy. Follow @makingwithmommy on Instagram to see more fun craft ideas for kids!


