


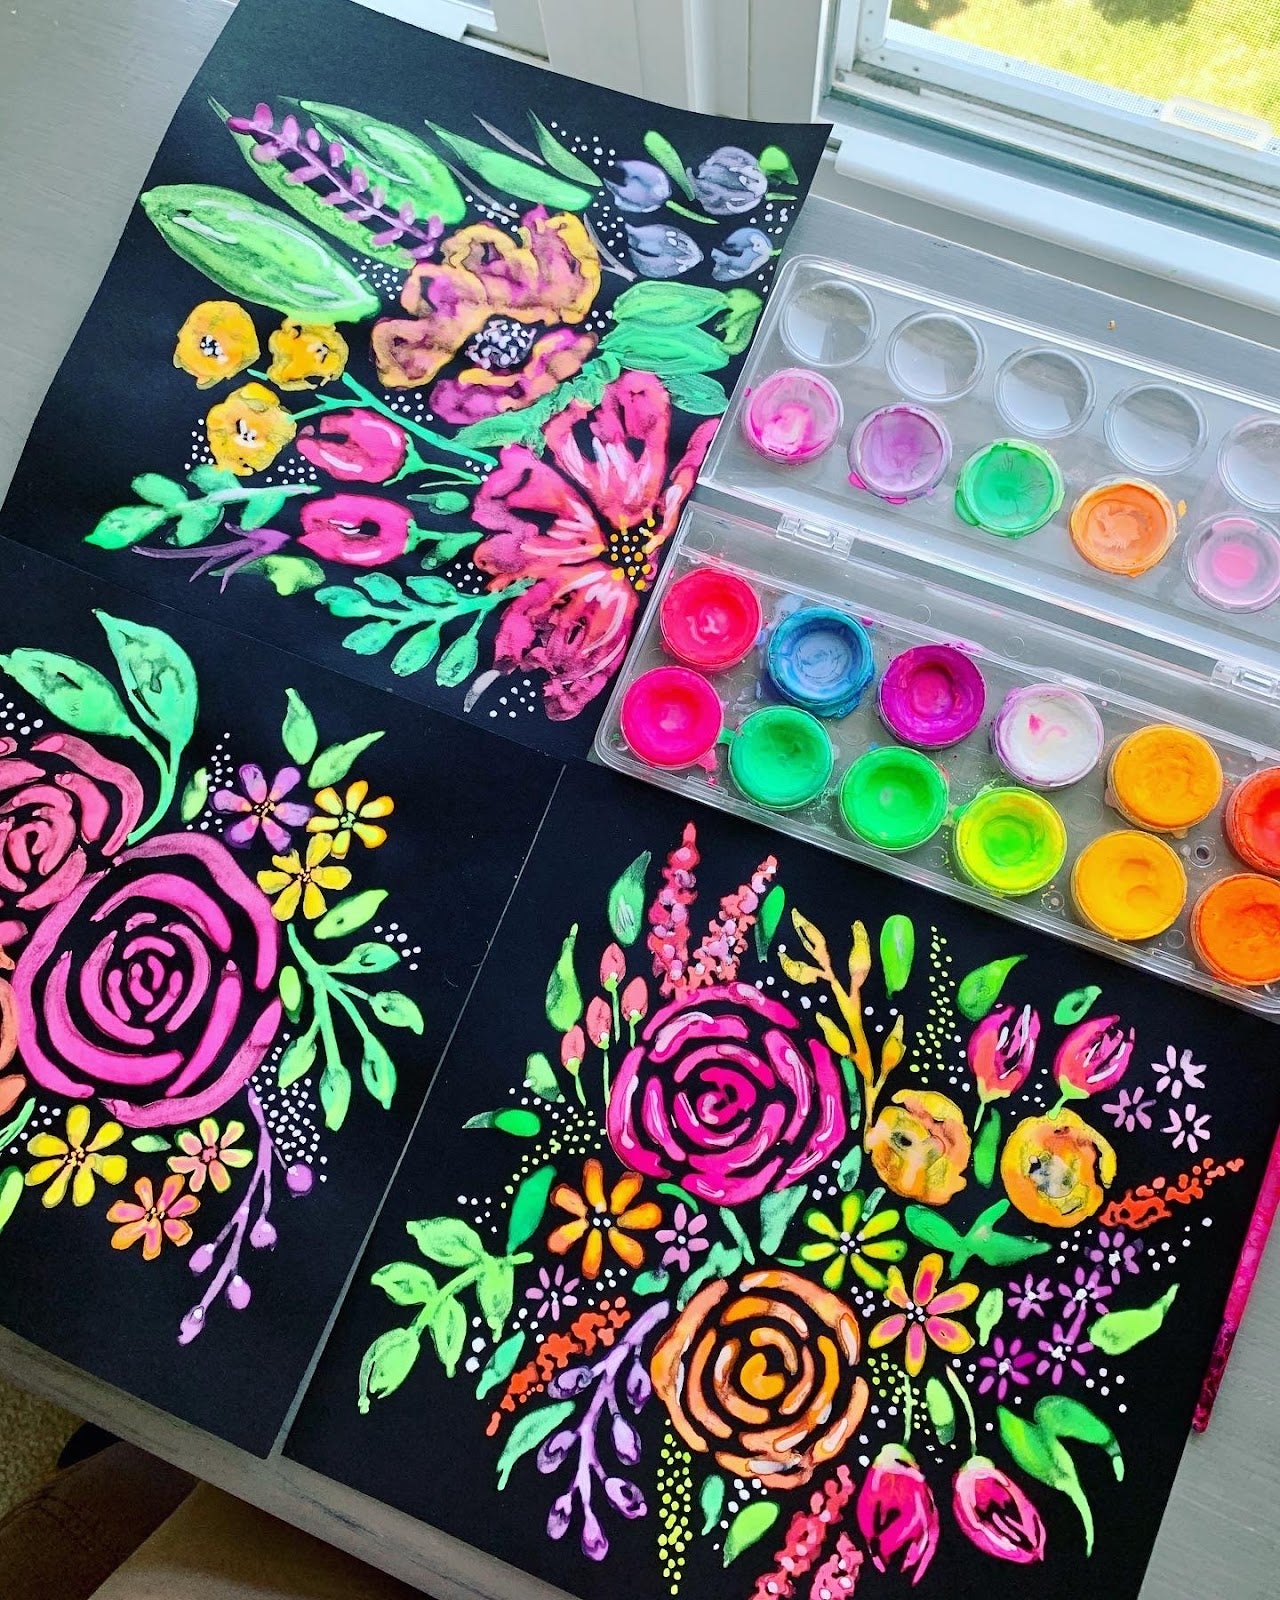
Watercolor. It's perhaps the very first painting medium that we are introduced to as kids, but I've discovered that no matter your age or skill level, watercolor is a fun way to play with color.
Whether looking to create using more traditional watercolor palettes or more unique means like mechanical watercolor pencils (so incredible to use,) OOLY has all the supplies you will need.
 Today we'll learn how to paint with watercolors to create nature or travel inspired paintings based on the four seasons. This is something the entire family can do individually or together. Best of all, many of the OOLY products you'll use are so easily transported without mess, that they are ideal to bring along on a road trip. So whether you are at home dreaming of a mountain escape or actually taking a road trip to a national park, be prepared with your favorite OOLY watercolor products for when inspiration strikes.

 Step 2: Wet your brush and use with a dark green from the same palette. Feel free to mix and blend paints in the palette before using to get your ideal color. Starting at the top of the tree, slowly glide your paintbrush down in a back and forth manner, going wider as you move down, and lifting it up every so often to create white space within the tree. The paint will get lighter as you move towards the bottom of the tree.
Tip: Make sure to use your paper towel. It will help you clean your brush, dab your brush to remove excess water, etc.
Step 2: Wet your brush and use with a dark green from the same palette. Feel free to mix and blend paints in the palette before using to get your ideal color. Starting at the top of the tree, slowly glide your paintbrush down in a back and forth manner, going wider as you move down, and lifting it up every so often to create white space within the tree. The paint will get lighter as you move towards the bottom of the tree.
Tip: Make sure to use your paper towel. It will help you clean your brush, dab your brush to remove excess water, etc.
 Step 3: Create another winter tree to the right, making the top of the tree a little shorter than the first. Choose a color which reminds you of winter, like blues or browns.
Step 4: Create another winter tree to the left, making the top of this tree once again a little shorter than the center tree. Choose a different winter color.
Step 5: Let dry.
Step 3: Create another winter tree to the right, making the top of the tree a little shorter than the first. Choose a color which reminds you of winter, like blues or browns.
Step 4: Create another winter tree to the left, making the top of this tree once again a little shorter than the center tree. Choose a different winter color.
Step 5: Let dry.
 Step 6: Once again create more of the wintry snow background so that it appears in the forefront of the trees as well as in the background.
Optional Fun: After drying, use bright colors to paint ornament balls on the center tree and a star for a holiday feel.
Step 6: Once again create more of the wintry snow background so that it appears in the forefront of the trees as well as in the background.
Optional Fun: After drying, use bright colors to paint ornament balls on the center tree and a star for a holiday feel.


 Step 4. Instead of the watercolor pencil, this time to make the tree trunk use the watercolor brush marker in brown. Simply remove the protective cover off of the marker, dip into water, and begin painting. Create the tree trunk and any branches peeking out from the leaves.
By: Debra Muccio (FindingDebra.com)
Today we'll learn how to paint with watercolors to create nature or travel inspired paintings based on the four seasons. This is something the entire family can do individually or together. Best of all, many of the OOLY products you'll use are so easily transported without mess, that they are ideal to bring along on a road trip. So whether you are at home dreaming of a mountain escape or actually taking a road trip to a national park, be prepared with your favorite OOLY watercolor products for when inspiration strikes.
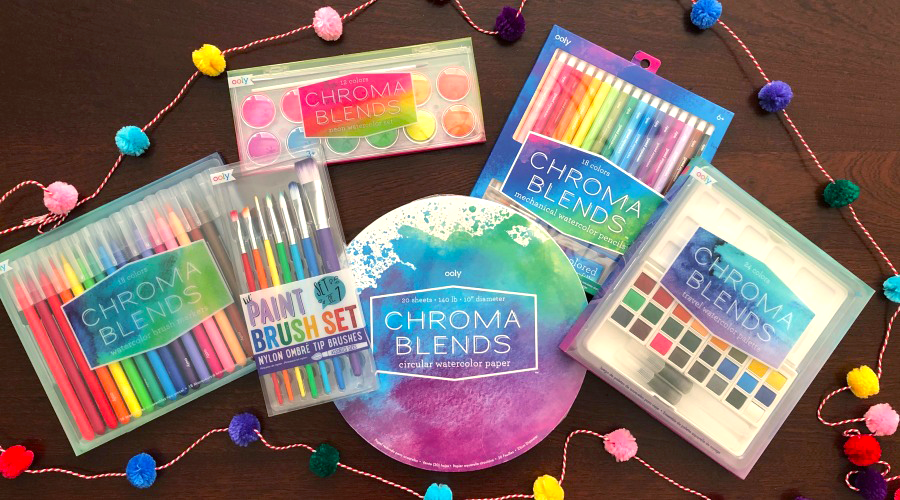
Watercolor Supplies Needed:
- Chroma Blends Circular Watercolor Paper
- Chroma Blends Watercolor Brush Markers
- Chroma Blends Mechanical Watercolor Pencils
- Chroma Blends Travel Watercolor Palette
- Chroma Blenda Watercolor Paint Set - Neon
- Lil Paint Brush Set (assorted sizes)
- Cup of water
- Paper towel
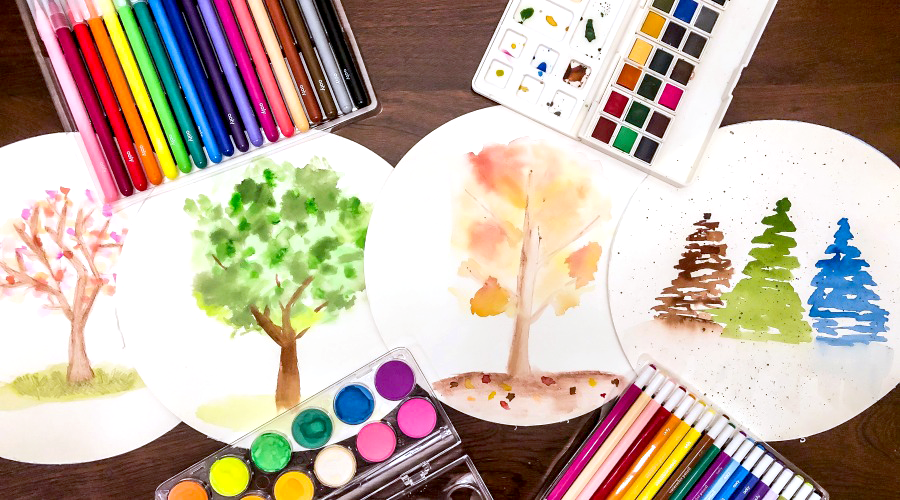
Watercolor Project: Trees of all Seasons
Spring. Summer. Autumn. Winter. Take your pick or pick them all. Let's learn how to use watercolor paint.Winter Watercolor
Step 1: Begin with the Chroma Blends Circular Watercolor Paper. It's a heavier and sturdier paper made to help absorb moisture. To make a wintry snow background, simply wet a small brush and use with either a dark gray or silver watercolor from the Chroma Blends Travel Watercolor Palette. Holding the paint brush several inches over the watercolor paper, gently tap the wooden or plastic part of that brush with another brush (or pencil,) forcing paint to fall down below, leaving a speckled effect on the paper. Let dry.
Step 2: Wet your brush and use with a dark green from the same palette. Feel free to mix and blend paints in the palette before using to get your ideal color. Starting at the top of the tree, slowly glide your paintbrush down in a back and forth manner, going wider as you move down, and lifting it up every so often to create white space within the tree. The paint will get lighter as you move towards the bottom of the tree.
Tip: Make sure to use your paper towel. It will help you clean your brush, dab your brush to remove excess water, etc.
Step 3: Create another winter tree to the right, making the top of the tree a little shorter than the first. Choose a color which reminds you of winter, like blues or browns.
Step 4: Create another winter tree to the left, making the top of this tree once again a little shorter than the center tree. Choose a different winter color.
Step 5: Let dry.
Step 6: Once again create more of the wintry snow background so that it appears in the forefront of the trees as well as in the background.
Optional Fun: After drying, use bright colors to paint ornament balls on the center tree and a star for a holiday feel.
Autumn Watercolor
To create this autumn tree, we will introduce the Chroma Blends Mechanical Watercolor Pencils in addition to using the traditional palette from above. I found that watercolor pencils are incredible to work with as you can sketch and be a little more definite and concrete with your lines before getting the water involved. If you like to draw and sketch, watercolor pencils are for you and I'll share how to use watercolor pencils - so easy. With autumn and summer trees being more full of leaves, I found it easier to paint the leaves first and leave the trunk and branches as the final step. Keep this in mind as you paint the area. Step 1: Wet the area in which you want to paint the tree - just a quick swipe with a wet brush will do. This will create a beautiful watercolor effect, very different than painting on dry paper. Step 2: Create blotches of paint (these will be your leaves) in the area using autumn colors like oranges, reds, yellows, and browns. Don't be afraid to mix colors. Feel free to let dry in between colors if you don't want them to blend as much on paper. Remember to leave a spot in the middle where you will draw your tree trunk. Step 3. Let dry. Step 4: Using a brown watercolor pencil, sketch your tree trunk and the ground underneath. To create more of a shadow on one side of the tree, I colored in more heavily on the left side. I used that same effect with the ground, having colored in darker towards the top of the ground and lighter towards the bottom. Add a few branches sneaking out from the leaves. Just a hint will do. Step 5. Grab a paintbrush, wet it, and go over the areas you drew with your watercolor pencil. Add water as needed to lighten or spread out the color. It magically transforms from pencil to watercolor - kids will especially love this effect.
Summer Tree
To create our summer tree, we will introduce the Chroma Blends Watercolor Brush Markers and Chroma Blends Watercolor Paint Set - Neon in addition to using the traditional palette from above. The neon colors bring an unexpected pop of color to your projects and when blended you'd never know they were neon. Just like with the autumn tree, I find it easier to create the trunk and branches near the end. Step 1: As with the autumn tree, paint the area you want the leaves to be with just water to begin with. Add lighter shades of green using your brush to make little circular clusters of leaves. The water on your brush will move on the paper making some areas darker, some lighter. Step 2: Let dry. Step 3. Using a more pointed brush, use brighter or darker colors to layer on top of the existing leaves, creating pockets of color. Little splotches or blobs of color. Super easy. Don't overthink it.
Step 4. Instead of the watercolor pencil, this time to make the tree trunk use the watercolor brush marker in brown. Simply remove the protective cover off of the marker, dip into water, and begin painting. Create the tree trunk and any branches peeking out from the leaves.
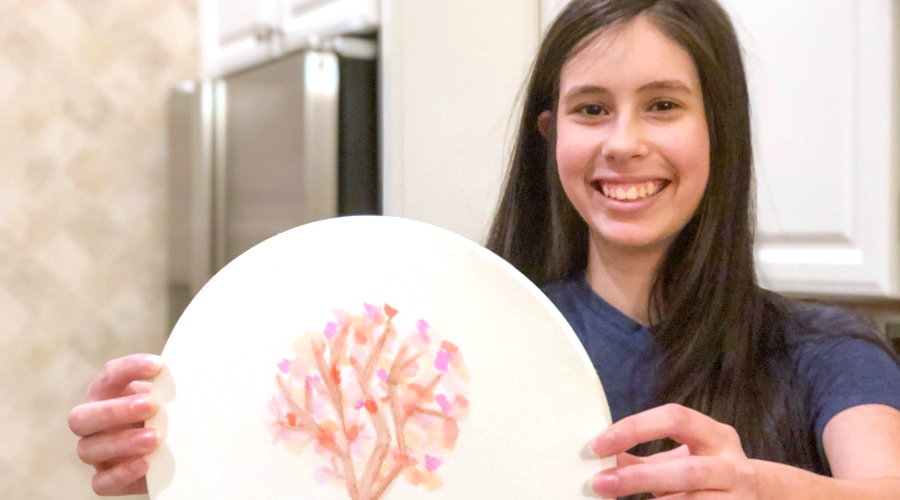
Spring Tree
The spring tree was the only tree where I actually focused on the trunk and branches first, since only a few blossoms were going to show. Step 1: Using the watercolor pencil, draw the tree trunk and branches. Using a brush full of water, go over the area you colored with the pencil. See it transform. Step 2: Let dry. Step 3: Using pinks and purples from either the traditional palette, the neon paint set, or the watercolor brush markers, add in flowers inspired by the annual cherry blossoms. This time use whichever medium was your favorite. Now you know how to use watercolor paint, pencils, markers, and traditional palettes. Happy crafting with OOLY!By: Debra Muccio (FindingDebra.com)


