


Blog by @emilee.mitchel on Instagram
Ho, ho, ho...hold on to your crafty hats, festive friends! Are you dreaming of a snow-kissed wonderland? Of frosted rooftops twinkling beneath a wintry moon? Well, gather round the fireplace, because we're about to turn those dreams into a DIY reality! With a sprinkle of creativity, a dash of holiday spirit, and just THREE of OOLY’s crafting essentials, we're creating our very own Winter Wonderland Village that has all of the fun and none of the frostbite!
Time Duration: 45 minutes + time for the air dry clay to dry (hot cocoa break anyone?)
Skill Level: Intermediate
OOLY Products Needed:


- Creatibles DIY Air Dry Clay Kit - Set of 24 - 2 sets
- Rainbow Sparkle Glitter Markers
- Vivid Pop! Water Based Paint Markers
- Hot glue (adult supervision required)
- Scissors or x-acto knife (adult supervision required)
Step 1: Roll out the Creatibles DIY Air Dry Clay Kit into 1/4 inch thick mini slabs. Using an x-acto knife, carve out the pieces for your mini homes. You’ll need a front and back wall of the house - each with a triangle peak, 2 rectangular side walls, and 2 snowy white rectangular roof slabs. I also cut some snowy roof accents for the front and back of the house. Let all these pieces dry while you drink some cocoa, wrap some presents, or watch your favorite Holiday movie.
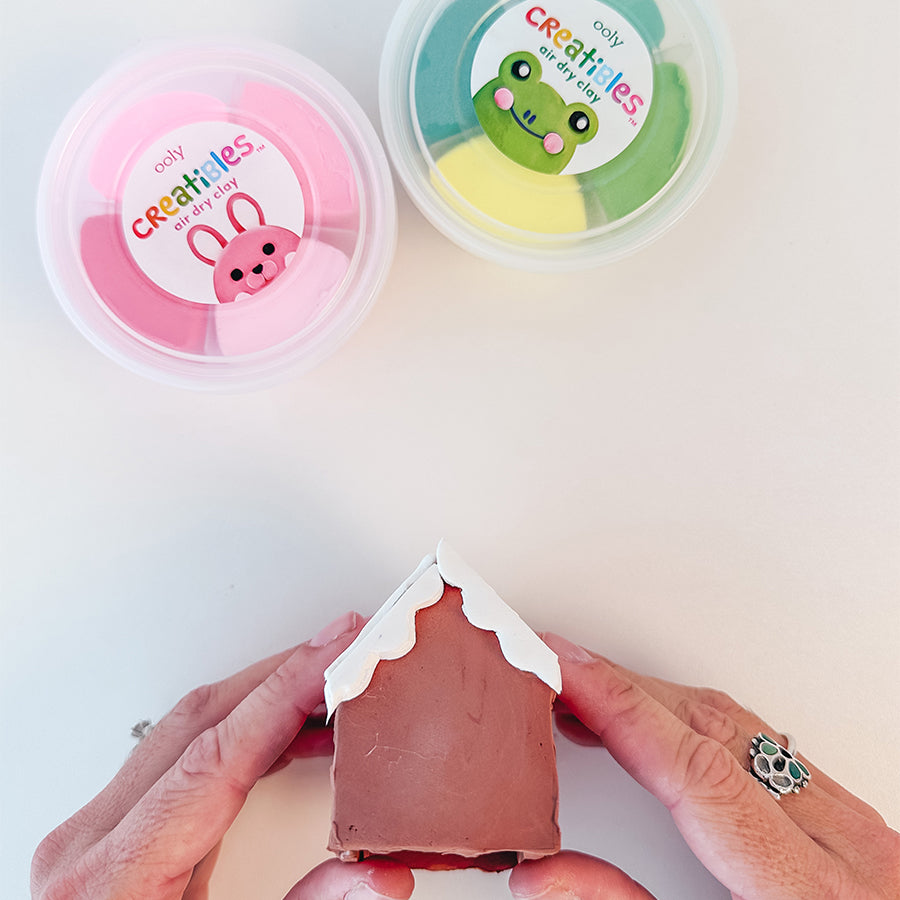
Step 2: Once dry, use a hot glue gun to glue the pieces together to build the house. First, attach the walls to the front piece, then attach the back piece to the other side of the walls. Last, attach the roof. It’s okay, if it looks a little messy we can clean that up in the next step.

Step 3: Roll out thin tendrils of white clay into frosty little snakes. Drape these over the house where all of the pieces meet.

Step 4: Voilà! This frosty addition isn't just practical; it also gives that snowy or frosted touch, making your village all the more whimsical.

Step 5: Using scissors or an x-acto knife, cut out your doors and windows.

Step 6: Now it’s time to get creative and decorate your wintry homes. I chose to add delightful clay gumdrops and candy colored embellishments. I also used Rainbow Sparkle Glitter Markers and Vivid Pop! Water Based Paint Markers to draw on some enchanting details!


Optional Extras:
- Mold picturesque trees or a tranquil pond for your snowy village backdrop.
- Create charming Christmas puppets with Stickiville stickers. The more, the merrier!


