


Winter crafts are a great way to ring in the season and keep busy indoors when it's cold outside. Whether your child is schooling from home or in the classroom, it is important to include some arts and crafts in your family’s day! Get in the holiday spirit by creating winter-themed crafts to display all around the house. Below you will find step-by-step guides on how to create three of our favorite winter crafts using OOLY best sellers.
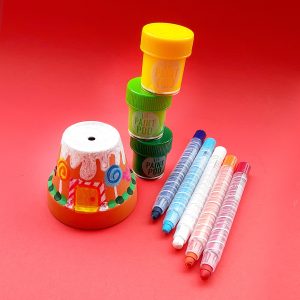
 Step 1: Gather OOLY materials and other items from the list above. Since we’re using paints, things could get a little messy, so be sure to protect your work surface.
 Step 2: Start by taking your terra cotta pot and turning it upside down. Using the medium of your choice (Lil’ Poster Paint Pods, Marvelous Multi Purpose Markers or Twisty Stix Oil Pastels), draw a squiggly white line around the diameter of the pot about a half inch or so from the top. This is the outline for your snow covered roof, so make sure you vary the length - the more organic looking the better! If you paint your pattern, allow it to dry before moving on to the next step.
 Step 3: Next, fill in the top of the pot with paint. If you want a more opaque white, wait for the layer to dry and repaint again.
Pro Tip: If you want a more opaque white, wait for the layer to dry and repaint again.
Step 3: Next, fill in the top of the pot with paint. If you want a more opaque white, wait for the layer to dry and repaint again.
Pro Tip: If you want a more opaque white, wait for the layer to dry and repaint again.
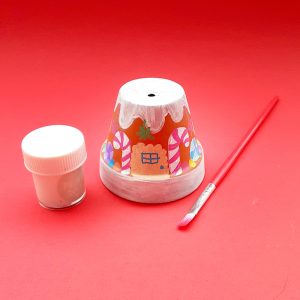
 Step 4: After the paint has dried, anchor the gingerbread house with a door. (Make sure you leave the rim of the pot untouched. You’ll paint that last!) Remember - your door doesn’t need to be a rectangle! Make it round, add a window - you’re only limited by your imagination!
 Step 5: Now that you have the main elements, it’s time to decorate! Use the medium of your choice or mix and match them - using paint for bigger areas and markers for the details (just make sure you allow for drying time if you’re using paint). Add candy canes, gumdrops, peppermints, or any other candy!
 Step 6: Now finish off the decorating with some snowy ground cover. Paint the bottom edge of the pot with white paint and let it dry, adding a second layer for a deeper white. Allow it to dry.
 Step 7: If you’re thinking about hanging your gingerbread house, now it’s time to add the ribbon and bell. To do this, simply cut 12 inches of ribbon and slide the bell into the middle. Thread the ribbon tips through the hole at the top of the pot and pull both strands all the way through. Tie a knot with the end.
 Step 8: Now that you have a knot, pull the ribbon all the way through the top so that the knot is inside the pot. You can keep the bell at the top of the ribbon, or slide it to one side to the bottom, touching the top of the pot, your choice.
These tasty-looking creations work great when hung, or sitting on a mantle. Add this to your list of fun family holiday crafts, and create an entire gingerbread village to display during the holidays.
We would love to see photos of your craft projects! Tag us on Instagram at @WeAreOOLY using #OOLYcreateyourhappy.
Step 8: Now that you have a knot, pull the ribbon all the way through the top so that the knot is inside the pot. You can keep the bell at the top of the ribbon, or slide it to one side to the bottom, touching the top of the pot, your choice.
These tasty-looking creations work great when hung, or sitting on a mantle. Add this to your list of fun family holiday crafts, and create an entire gingerbread village to display during the holidays.
We would love to see photos of your craft projects! Tag us on Instagram at @WeAreOOLY using #OOLYcreateyourhappy.
Winter Crafts for All Skill Levels
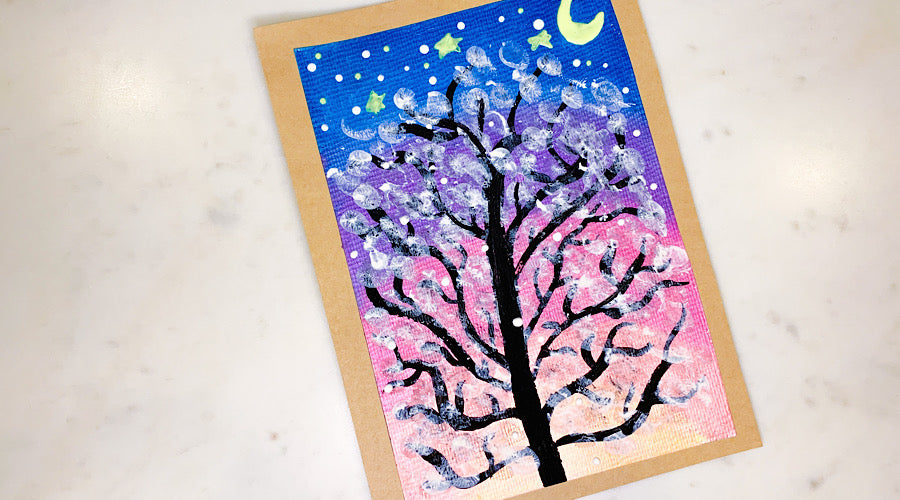
Thumb Print Winter Scene
This textured craft includes drawing, painting and finger-painting which is sure to engage children of all ages! Supplies You'll Need:- Chroma Blends Watercolor Paper
- White DIY Cover Sketchbook
- Rainbow Sparkle Watercolor Gel Crayons
- Lil Paint Brush Set
- Cup of water
- Lil Poster Paint Pods
- The Ink Works Markers
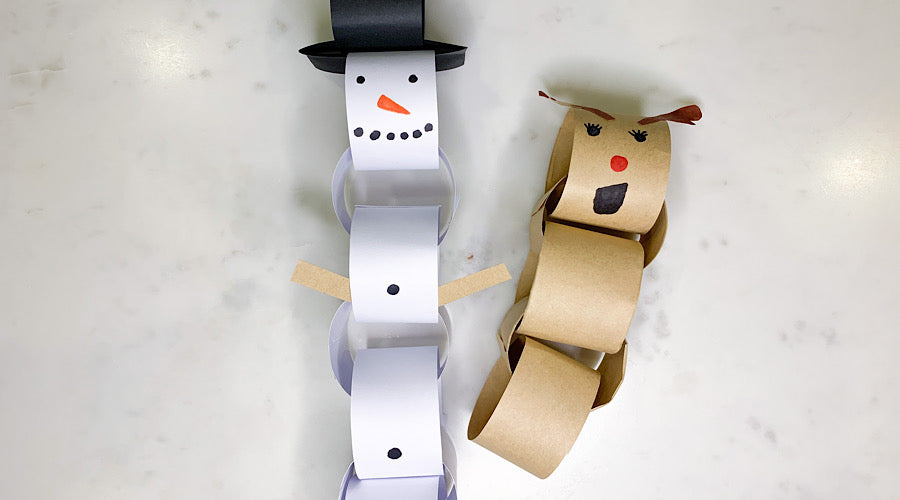
Paper Chain Characters
This fun winter craft can be customized to become anything you want! Here we have a Snowman and Rudolph, but the possibilities are endless! Characters can even be chained together to create a holiday craft garland for your home! OOLY Products Needed: Other Items Needed:- Glue

Forever Gingerbread Houses
If you love the look of a sweet gingerbread house, but find yourself disappointed when it’s inevitably eaten, this is the perfect craft for you. Using mini terracotta pots, paints, and a few other materials, you can create a delicious looking gingerbread house, without the sugar rush! It’s one of our favorite sweet and fun holiday crafts! OOLY Products Needed: Other Items Needed:- Scissors (adult supervision required)
- Bells
- Ribbon
- Mini Terracotta Pots (pictured here are 2.25 inches tall)
Step 1: Gather OOLY materials and other items from the list above. Since we’re using paints, things could get a little messy, so be sure to protect your work surface.
Step 2: Start by taking your terra cotta pot and turning it upside down. Using the medium of your choice (Lil’ Poster Paint Pods, Marvelous Multi Purpose Markers or Twisty Stix Oil Pastels), draw a squiggly white line around the diameter of the pot about a half inch or so from the top. This is the outline for your snow covered roof, so make sure you vary the length - the more organic looking the better! If you paint your pattern, allow it to dry before moving on to the next step.
Step 3: Next, fill in the top of the pot with paint. If you want a more opaque white, wait for the layer to dry and repaint again.
Pro Tip: If you want a more opaque white, wait for the layer to dry and repaint again.
Step 4: After the paint has dried, anchor the gingerbread house with a door. (Make sure you leave the rim of the pot untouched. You’ll paint that last!) Remember - your door doesn’t need to be a rectangle! Make it round, add a window - you’re only limited by your imagination!
Step 5: Now that you have the main elements, it’s time to decorate! Use the medium of your choice or mix and match them - using paint for bigger areas and markers for the details (just make sure you allow for drying time if you’re using paint). Add candy canes, gumdrops, peppermints, or any other candy!
Step 6: Now finish off the decorating with some snowy ground cover. Paint the bottom edge of the pot with white paint and let it dry, adding a second layer for a deeper white. Allow it to dry.
Step 7: If you’re thinking about hanging your gingerbread house, now it’s time to add the ribbon and bell. To do this, simply cut 12 inches of ribbon and slide the bell into the middle. Thread the ribbon tips through the hole at the top of the pot and pull both strands all the way through. Tie a knot with the end.
Step 8: Now that you have a knot, pull the ribbon all the way through the top so that the knot is inside the pot. You can keep the bell at the top of the ribbon, or slide it to one side to the bottom, touching the top of the pot, your choice.
These tasty-looking creations work great when hung, or sitting on a mantle. Add this to your list of fun family holiday crafts, and create an entire gingerbread village to display during the holidays.
We would love to see photos of your craft projects! Tag us on Instagram at @WeAreOOLY using #OOLYcreateyourhappy.


