


Craft blog by: Jenna Robertson @naptimepress
Unleash your inner child with this fun and easy under the sea scene made using crayons, colored pencils, markers, watercolors and…. bubble wrap! This watercolor art project is great for all skill levels as it can transition from a fun and easy kids craft to a more sophisticated watercolor art project. Let your imagination and creativity soar with this bubble wrap craft as you create you own unique underwater scene.
Time: 30 minutes
Skill level: Beginner
OOLY Products Needed:
- Lil’ Watercolor Paint Pad
- Lil’ Watercolor Paint Pods
- Yummy Yummy Scented Markers
- Brilliant Bee Crayons
- Color Together Colored Pencils
- Bubble wrap
- Cup of water
- Paper towel
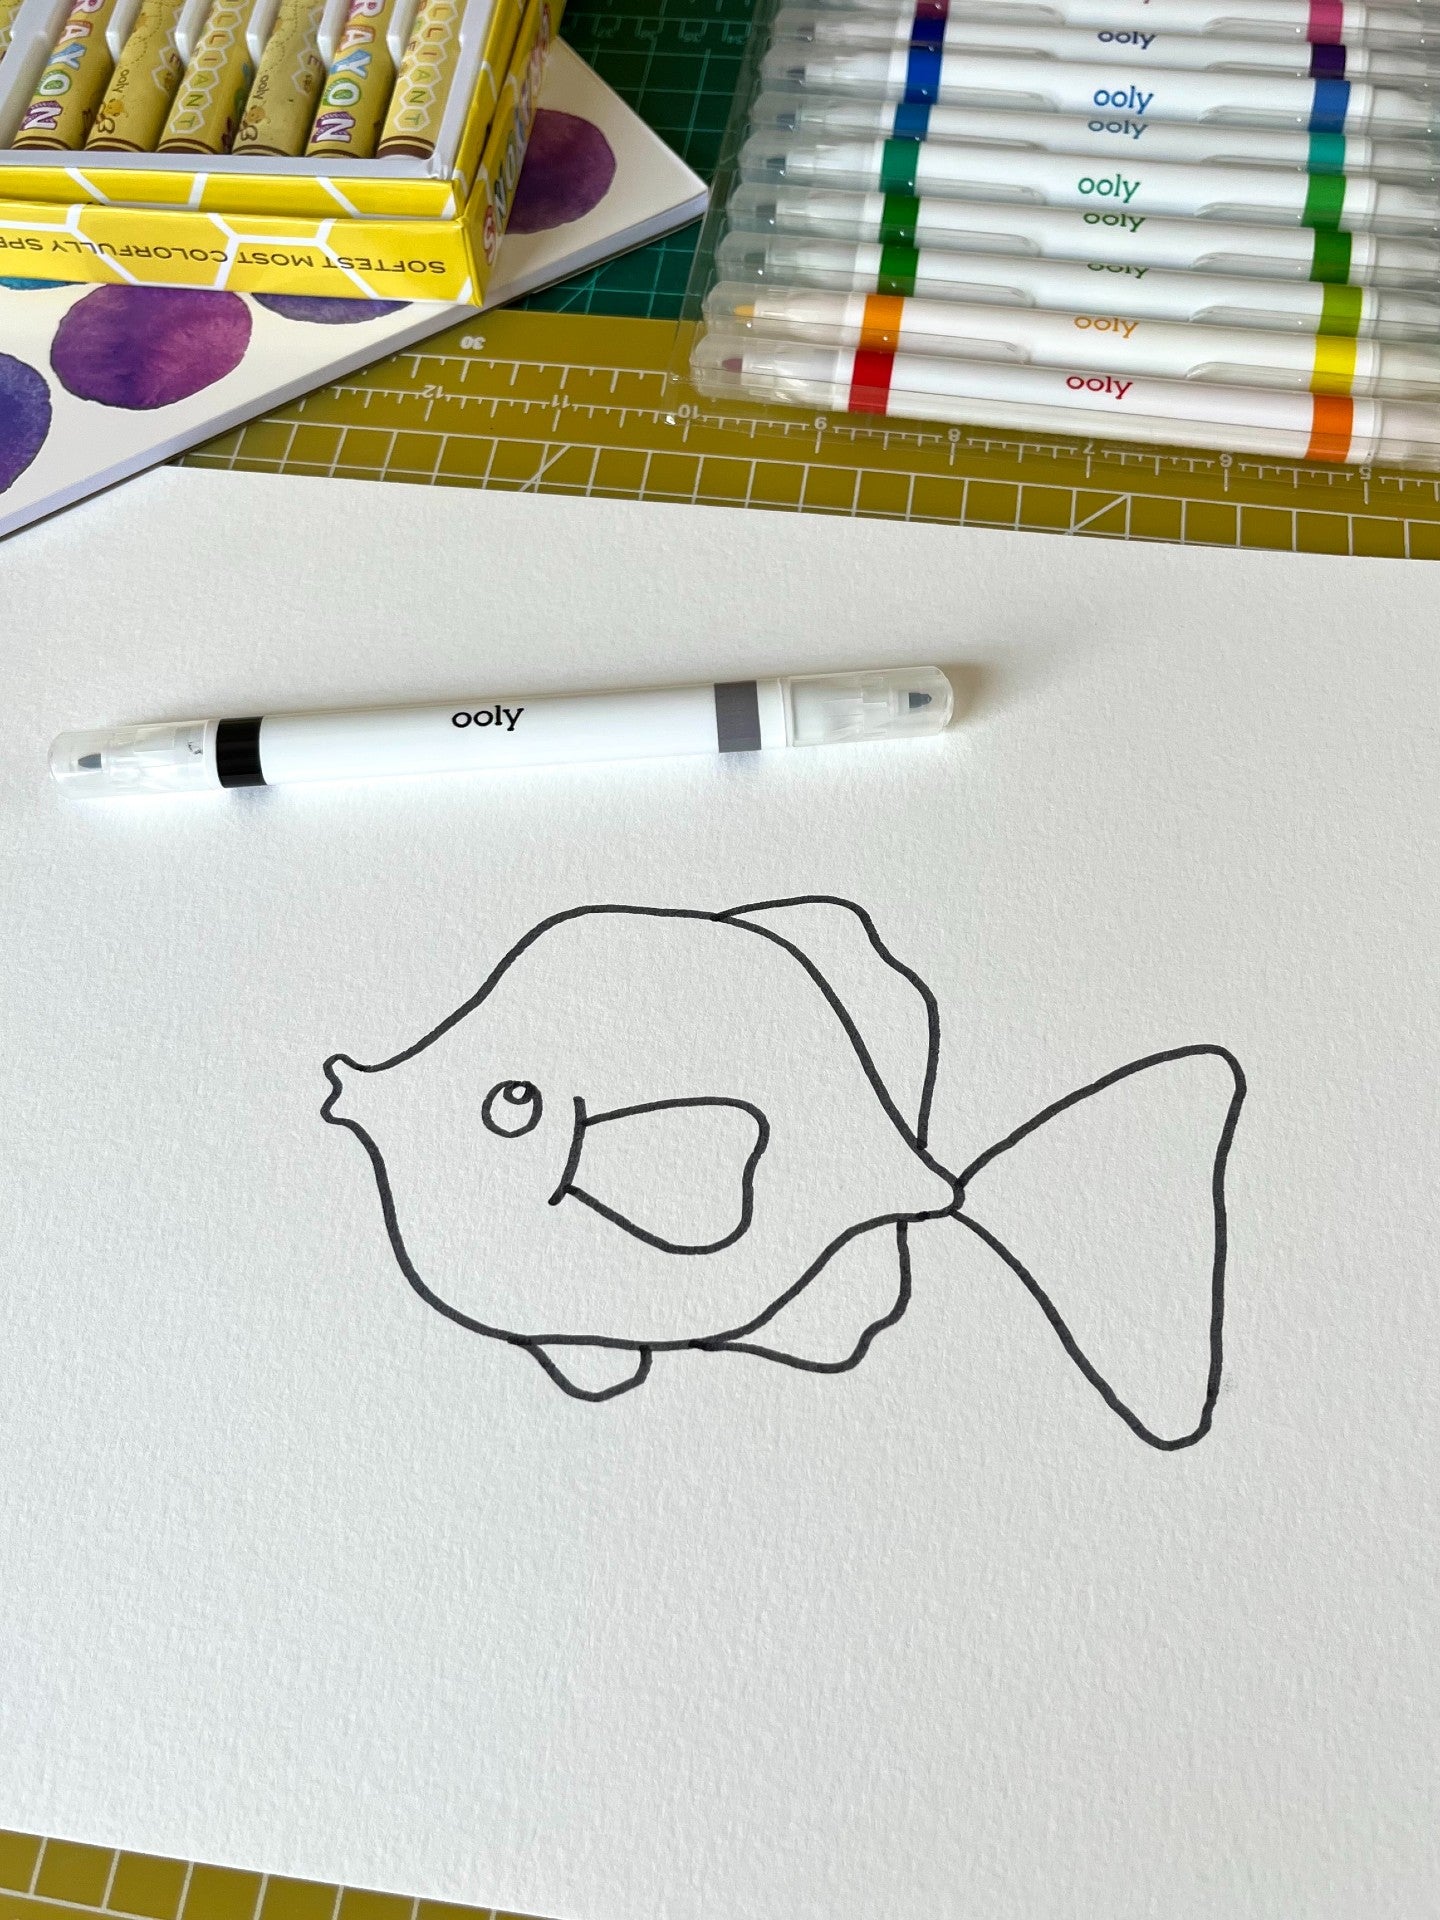
Step 1: Start by using a marker out of the Yummy Yummy Scented Markers set to draw the shape of a fish on your Lil’ Watercolor Paint Pad.

Step 2: Use a Brilliant Bee Crayon to add some details to your fish. I added some dash marks to the body and some stripes to the fins with a white crayon so the white of the paper would remain.
Tip: Any color crayon “resists” watercolor paint and will still show up once we paint over it in the next step.

Step 3: Then, pick a color (or several!) from your Lil’ Watercolor Paint Pods to fill in your fish. I started with a turquoise color and then added in a bit of lime green and golden yellow.
Tip: Picking “neighbors” in the rainbow will help you get really nice color mixtures and avoid ending in muddy tones in this mixed media paper craft.
Step 4: Next, let’s create some lovely surroundings. Pick out another Yummy Yummy Scented Marker to make an outline of some coral. The nice thing about coral is that it can be almost any shape. I like to try and give it loads of upward reaching “arms” that end in nice curves.

Step 5: Repeat the crayon resist technique we used in the fish. I chose a pink Brilliant Bee Crayon to draw small circles and then filled it in with a lighter pink watercolor.
Step 6: After that, pick another marker for making another bit of scenery. This time, seaweed! Like coral, many shapes can be used and still achieve a seaweed shape.

Step 7: Next, fill the shape in with two different yellows from your Lil’ Watercolor Paint Pod set. I chose a light color so that I could easily add some details on top of the paint once it dries.
Step 8: By now your fish should have had time to dry. Grab a couple Color Together Colored Pencils to add some more detail and interest to your fish. I used teal and yellow-green.

Step 9: Now that your seaweed has dried, it’s time to add some details with the Color Together Colored Pencils on top of the paint. I used two colors, pink and purple, to add some leafy lines to my seaweed.
Tip: If your seaweed is still wet when you get to this step please resist the urge to keep going. Wait for it to dry. Colored pencils over wet watercolors will not work properly and will likely result in torn paper.


Step 10: For a final flourish, grab the bubble wrap! A small scrap works best. Use several Yummy Yummy Scented Markers to color the “bubble” side of a small scrap of bubble wrap. Flip bubble wrap over and press (like a stamp) onto your page around your fish. Repeat as desired until your page is bubbled to your liking.
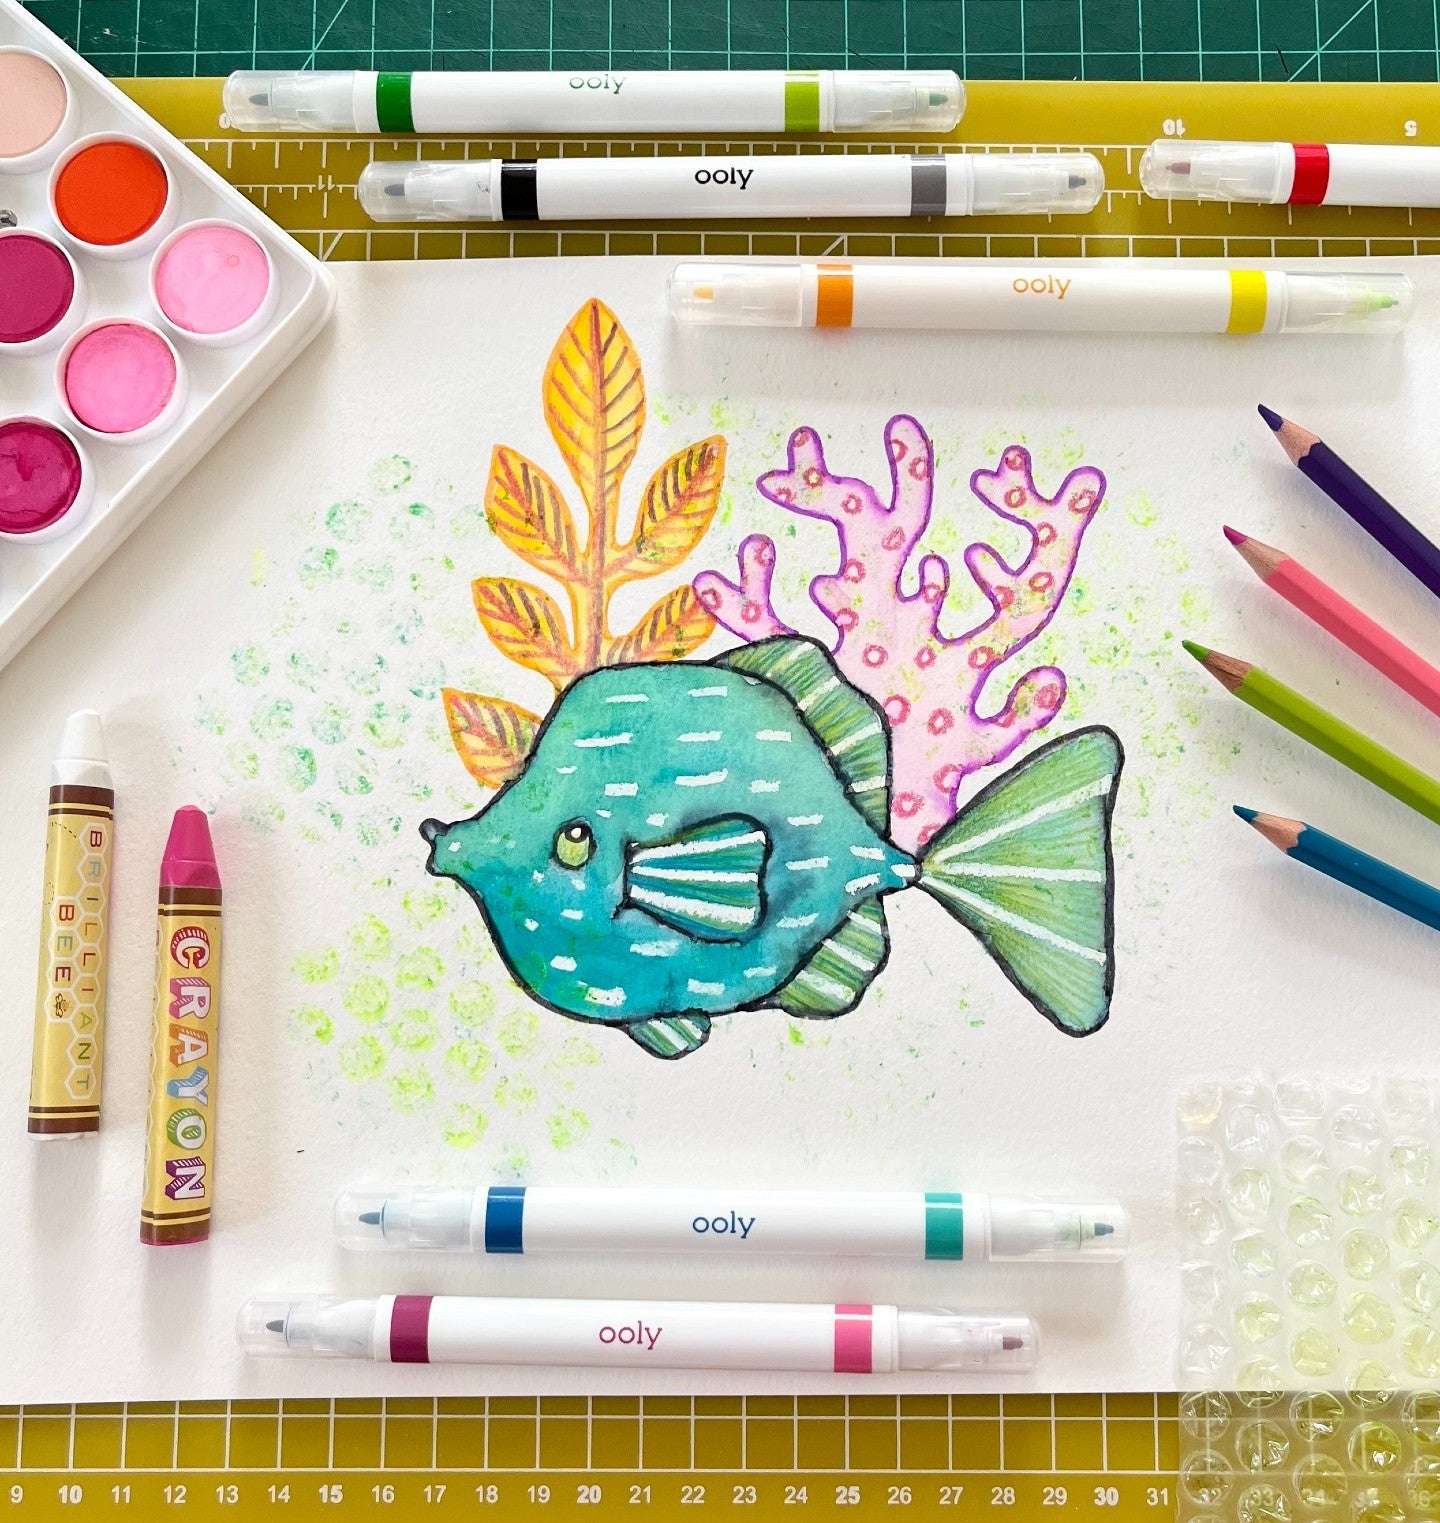
Once you’ve bubble printed to your heart’s content, it is time to admire your lovely multimedia art. This colorful watercolor craft can be framed to display your home, or transformed into a handmade card to give to a loved one. The possibilities are endless with this mixed media paper craft!
We would love to see photos of your craft projects! Tag us on Instagram at @WeAreOOLY using #OOLYcreateyourhappy.


